How to Nurture Leads for Electronics Shopify Stores With Email
If you run a Shopify electronics store, you’re selling considered purchases. Buyers compare specs, worry about compatibility, evaluate warranties and support, and often need a few nudges before they commit. This step‑by‑step guide shows you how to build an email nurturing system that’s compliant, deliverable, and measurable—so you can turn subscribers into customers and grow LTV.
What you’ll accomplish
- Configure sender authentication and meet Gmail/Yahoo 2024 requirements
- Stay compliant across CAN‑SPAM, GDPR, and CASL
- Build the seven core lifecycle flows tailored for electronics
- Segment and personalize by device ecosystem, compatibility, and lifecycle
- Measure revenue accurately with UTMs and multi‑touch attribution
Effort and timeline
- Setup difficulty: Intermediate
- One‑time setup: 1–2 days (DNS propagation may take up to 48 hours)
- Ongoing optimization: 1–2 hours per week
Success criteria
- Consistent inbox placement and spam complaint rate <0.1% (never ≥0.3%)
- Functional one‑click unsubscribe; opt‑outs honored on time
- Active core flows with healthy click and conversion rates
- Standardized UTMs and reconciled revenue across Shopify, your ESP, and analytics
Step 1: Confirm compliance and deliverability prerequisites
Do this before you send a single nurturing email.
Compliance essentials
- CAN‑SPAM (US): Include your physical address, non‑deceptive headers/subject lines, and a clear opt‑out you honor within 10 business days. See the FTC’s concise guidance in the 2024‑updated CAN‑SPAM compliance guide.
- GDPR (EU): For marketing emails to EU residents, obtain and record explicit consent; allow recipients to withdraw consent as easily as they gave it. Review the legal definition of consent in GDPR Article 4(11) and Article 7 (gdpr‑info, 2024).
- CASL (Canada): Requires express or valid implied consent, clear sender identification, and an unsubscribe processed within 10 business days. See the CRTC’s CASL compliance guide (2024).
Bulk sender requirements (Gmail/Yahoo, 2024–2025)
- Gmail now requires authentication, one‑click unsubscribe, and low spam rates for bulk senders; Google reiterated these standards in its Product Blog announcement (2023).
- Yahoo aligns with similar “user‑first” standards and authentication best practices; see Yahoo Sender Best Practices (2024).
Verification checklist
- You have documented consent where required (GDPR/CASL) and a compliant footer (CAN‑SPAM/CASL).
- You can process unsubscribes automatically and within the required timeframe.
- You’ve reviewed the Gmail and Yahoo standards and will add the one‑click unsubscribe header in your ESP.
Pro tip: Keep a simple consent log (source, timestamp, IP) and store it in your ESP/CRM. It’s invaluable for audits.
Step 2: Authenticate your domain (SPF, DKIM, DMARC) and enable one‑click unsubscribe
Why this matters: Proper authentication and one‑click unsubscribe dramatically improve deliverability and are now table stakes with Gmail and Yahoo.
- Publish SPF and DKIM for your sending domain
- SPF example (TXT on your root domain):
v=spf1 include:_spf.google.com ~all - DKIM: Your ESP will generate CNAME records using a selector such as
s1._domainkey.yourdomain.com. Publish those exactly as instructed.
- Publish DMARC with alignment to your From domain
- Start with monitoring mode to validate alignment and collect reports:
v=DMARC1; p=none; rua=mailto:dmarc-rua@yourdomain.com; ruf=mailto:dmarc-ruf@yourdomain.com; fo=1 - Once stable, consider moving to
p=quarantineorp=rejectfor stronger protection. Google notes the need to authenticate and align; see its Gmail protections announcement (2023).
- Add one‑click unsubscribe headers
- Add these headers via your ESP (check advanced settings or contact support):
List-Unsubscribe: <mailto:unsubscribe@yourdomain.com>, <https://yourdomain.com/unsubscribe/abc123> List-Unsubscribe-Post: List-Unsubscribe=One-Click - RFC 2369 and RFC 8058 define this behavior; see the 2024 overview by AWS in its bulk sender changes explainer (AWS SES Blog).
- Register in Google Postmaster Tools and monitor reputation
- Add and verify your sending domain to track authentication, spam rate, and reputation. Aim to keep Gmail spam complaint rate well under ~0.3% and target <0.1%. While Google doesn’t publish an exact threshold, industry summaries (e.g., Litmus, Postmark) and Google’s own guidance support maintaining very low complaint rates.
Verify it worked
- Send a test to a Gmail inbox, view original, and confirm
SPF=pass,DKIM=pass, andDMARC=passon the From domain. - Inspect headers to see
List-UnsubscribeandList-Unsubscribe-Postpresent; click the one‑click unsub link and confirm the contact is marked unsubscribed within 48 hours. - Check Google Postmaster Tools the next day to see authentication green and spam rate near 0%.
Troubleshooting
- If SPF/DKIM fail: Look for typos or wrong record types (TXT vs CNAME); ensure no extra spaces/quotes; wait for DNS propagation and retest.
- If one‑click is missing: Ensure your ESP supports RFC 8058 and the feature is toggled on for bulk mail.
Step 3: Connect Shopify data to your ESP and establish list hygiene
- Connect your ESP (e.g., Klaviyo or Shopify Email) to Shopify so viewed product, added to cart, checkout started, and purchase events are available for flows.
- Enable double opt‑in for EU traffic (GDPR) and wherever list quality is a concern.
- Suppress hard bounces and role accounts; build an “unengaged” segment for a later sunset flow instead of blasting all contacts.
Quick QA
- Trigger a test view/add‑to‑cart/checkout on your store while logged in as a seed address; confirm events appear in the ESP profile within minutes.
- Confirm your default footer includes your company address, an easy unsubscribe link, and support contact.
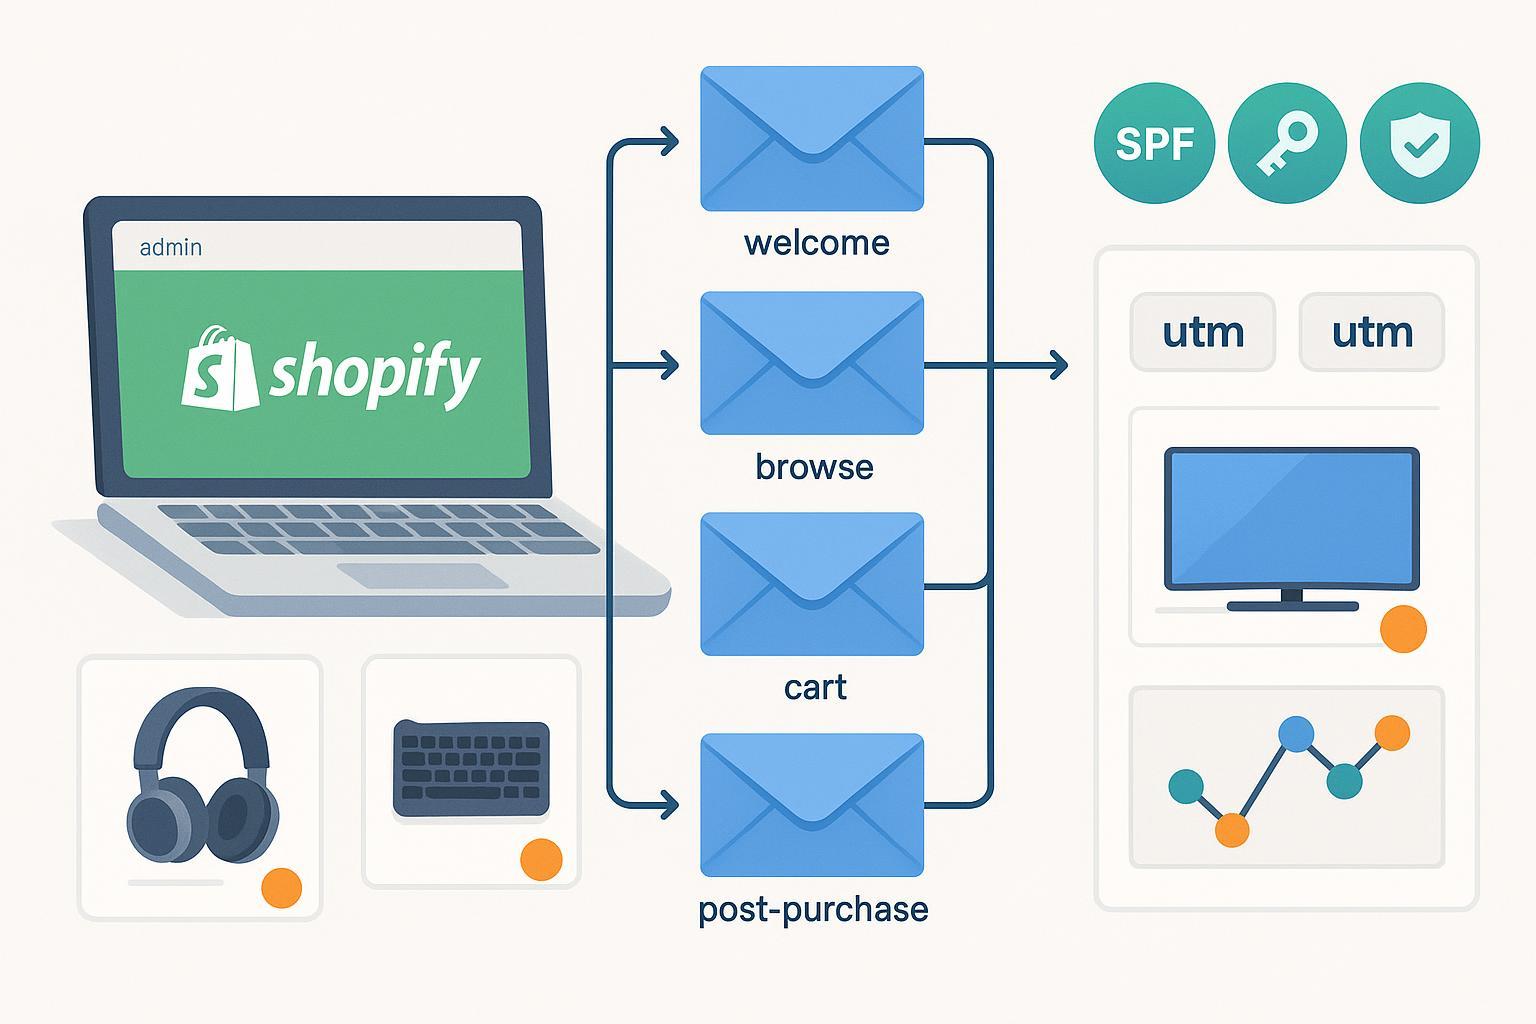
Step 4: Build electronics‑tailored lifecycle flows
Below are the core flows you should launch first. Use these starting points and test timing/content.
- Welcome series (3–5 emails over 10–14 days)
- Trigger: New subscriber (post‑signup or post‑content download).
- Goals: Set expectations, collect preferences, educate, and introduce bestsellers.
- Electronics content:
- Compatibility primer: “How to know it fits your setup (HDMI/USB‑C/Bluetooth profiles).”
- Comparison micro‑guide: “Model A vs Model B—what actually matters.”
- Setup preview: Unboxing and 60‑second install video.
- Incentive (optional): Limited‑time accessory bundle.
- Copy idea: “Is it compatible? Use this 30‑second checklist before you buy.”
- Browse abandonment (2–3 emails within 24–48 hours)
- Trigger: Viewed product/category but no add‑to‑cart.
- Content:
- Spec highlights with plain‑English benefits.
- Side‑by‑side comparison vs similar models.
- FAQs: power requirements, smart‑home standards (Matter/Zigbee/Z‑Wave), ports.
- Trust levers: Reviews, certifications (UL/CE/FCC), warranty length badges.
- Cart abandonment (2–3 emails at ~1h, 24h, 72h)
- Trigger: Abandoned checkout/cart.
- Content:
- Cart contents with image and key specs.
- Risk reducers: Returns policy, warranty terms, live support link.
- Financing: “As low as $/mo with approvals.”
- Real‑time inventory/price changes if supported.
- Copy idea: “Worried about fit? Reply with your device model—we’ll confirm compatibility.”
- Pre‑purchase education drip (2–4 emails over 1–2 weeks)
- Trigger: Engaged prospects (clicked in welcome/browse) but no purchase.
- Content:
- Feature deep dives and explainer videos.
- Accessory/compatibility checklist (cables, mounts, batteries).
- Social proof: “What owners say after 30 days.”
- Post‑purchase onboarding (3–5 emails over 7–21 days)
- Trigger: Order fulfilled.
- Content:
- Unboxing/setup guide with visuals and first‑use tips.
- Firmware/update instructions and “what to do if…” support pointers.
- Warranty registration link and care/maintenance.
- Ask for a review/UCG; offer accessory bundles that are 100% compatible.
- Winback/upgrade (2–3 emails at 45–120 days, product dependent)
- Trigger: No purchase since last order within lifespan window.
- Content:
- Trade‑in/upgrade paths; “What’s new in the ecosystem.”
- Extended warranty or protection plans.
- Sunset/unengaged (1–2 emails)
- Trigger: No engagement for 120–180 days.
- Content:
- Preference center: pick frequency, categories, device ecosystem.
- Final notice of suppression to protect deliverability.
Flow QA checkpoints
- Fire a test event for each trigger and ensure the correct profile enters the flow.
- Spot‑check dynamic blocks (e.g., accessory recommendations) render for different devices.
- Confirm suppression rules prevent recent purchasers from receiving cart/browse reminders immediately after buying.
Step 5: Segment and personalize for compatibility and lifecycle
High‑intent segments for electronics
- Lifecycle: Prospect vs. Active customer vs. Lapsed customer.
- Product category: TVs, audio, components, smart‑home.
- Compatibility ecosystem: Apple/Android/Windows; smart‑home standards (Matter, Zigbee, Z‑Wave).
- Price sensitivity/financing interest: Based on past clicks or PDP interactions.
- Warranty/service status: Registered warranty, open support tickets, RMA history.
Data capture
- Progressive profiling in the welcome series: Ask for device brand, budget, and experience level to tailor recommendations.
- Preference center: Let subscribers choose categories and frequency; this improves engagement and reduces complaints.
Dynamic content ideas
- Show a “Works with [Your Device]” badge when the profile includes device ecosystem.
- Accessory fit: Auto‑swap images and links for the exact cable/battery/mount that fits their last viewed or purchased model.
Step 6: Design email content that tech shoppers can scan
- Skimmable modules: Lead with benefits, then specs. Use short paragraphs and bullet lists.
- Comparison tables: Highlight the 3–5 specs that matter and what they mean in plain English.
- Trust signals: Warranty length, certifications, and review counts near the primary CTA.
- Accessibility: Alt text on images, high contrast, 16px+ body text, and meaningful link text.
- Footer safety: Keep a manual “Unsubscribe” link and support link in the footer even with one‑click headers enabled.
Benchmark context
- Flows typically outperform campaigns in clicks and revenue per recipient. Klaviyo’s public 2024 dataset indicates higher engagement for automations than one‑off campaigns; see the Klaviyo 2024 email benchmarks by industry. Treat these as directional and validate against your own account.
Step 7: Measure what matters—UTMs, server‑side events, and multi‑touch attribution
Opens are noisy (Apple MPP preloads images), so focus on clicks, conversions, and revenue per recipient.
- Standardize UTMs for every email link
- Example:
utm_source=newsletter&utm_medium=email&utm_campaign=welcome-series&utm_content=specs-cta - Keep names lowercase, consistent, and documented. For a primer, see Shopify’s overview of UTM parameters for marketers (Shopify Blog, 2024).
- Add server‑side purchase events to reduce tracking loss
- Server‑to‑server events (e.g., via GTM server or platform integrations) help recover attribution when client‑side pixels are blocked. For background, read the 2024 overview on server‑side tracking for Shopify by Littledata.
- Use a multi‑touch model suited to longer electronics cycles
- Position‑based or time‑decay models better reflect multi‑step journeys than last click.
Practical example workflow
- Click tracking: Ensure every email CTA carries standardized UTMs.
- Session mapping: Your analytics tool ingests those UTMs and matches sessions to email.
- Order stitching: Server‑side purchase events link orders back to sessions and touchpoints.
- Attribution view: Use a multi‑touch platform to see the share of revenue influenced by email alongside paid/social/organic.
Where a dedicated attribution platform fits
- A platform like Attribuly can unify email clicks, site sessions, and orders into multi‑touch models so you can see email’s real contribution next to other channels. Disclosure: Attribuly is our product.
Verification and reconciliation
- Send a test email to yourself, click each link, and confirm UTMs appear in GA4 Realtime.
- Place a test order; verify the purchase appears in Shopify, your ESP’s conversion reporting, and your attribution view.
- Compare revenue by campaign across ESP and analytics. Align attribution windows/models and note expected deltas.
Step 8: QA and troubleshooting—If X, then Y
Deliverability
- Spike in spam complaints (≥0.3% in Postmaster):
- Pause broad campaigns; send only to highly engaged segments.
- Reduce send frequency; audit acquisition sources and suppress low‑quality contacts.
- Reconfirm one‑click headers and From‑domain alignment.
- DKIM/SPF/DMARC failure:
- Recheck DNS values for typos, stray characters, and record type mismatches; wait for propagation and retest.
- Poor inbox placement after a volume ramp:
- Warm the domain gradually, prune unengaged contacts, and avoid sudden list expansions.
Flow logic
- Browse/cart flows not triggering:
- Confirm Shopify events are reaching your ESP; check flow filters and delays; test with a clean seed user.
- Wrong dynamic content rendering:
- Validate profile properties and fallback content; QA multiple device ecosystems.
Attribution
- Large deltas between ESP and analytics revenue:
- Align attribution windows and deduplication rules; confirm per‑link UTMs; ensure server‑side purchase events are active and not double‑counting.
Step 9: Operating cadence and optimization
Weekly
- Review flow performance: Click rate, conversion rate, and revenue per recipient.
- Check Google Postmaster Tools for authentication status, spam rate, and reputation trends.
- Triage unengaged segments and update the sunset logic as needed.
Monthly
- A/B test one element per flow (subject line, first fold, comparison layout, incentive timing).
- Refresh product education and compatibility content when new models or standards (e.g., Matter updates) roll out.
- Reconcile revenue across Shopify, ESP, and attribution to catch drift.
Quarterly
- Audit consent capture and unsubscribe performance (process times and header presence).
- Consider enforcing DMARC (
p=quarantine/reject) once you’ve validated alignment, then explore BIMI for brand trust.
Citations and deeper reading (embedded above)
- Gmail/Yahoo sender standards: Google’s Gmail security and authentication announcement (2023) and Yahoo Sender Best Practices (2024)
- One‑click unsubscribe and technical details: AWS SES bulk sender changes overview (2024)
- Legal compliance: FTC CAN‑SPAM guide (2024), GDPR Articles 4(11)/7 (gdpr‑info), CRTC CASL guide (2024)
- Benchmarks: Klaviyo 2024 email benchmarks
- Measurement: Shopify UTM parameters overview (2024), Littledata on server‑side tracking (2024)
Note on open rates and MPP: Apple’s Mail Privacy Protection inflates opens by preloading images. Treat opens as directional only and optimize for clicks, conversions, and revenue per recipient. For an email‑industry overview, see the MPP discussions in Litmus and Postmark’s 2024 articles referenced in the sender‑standards resources.
Next steps
- Build or tighten your UTMs, then instrument server‑side purchase events.
- Launch the seven flows and set weekly QA checks for deliverability and flow triggers.
- Add a lightweight attribution view to validate email’s contribution beyond last click. When you’re ready to formalize multi‑touch analytics for email and ads together, explore pricing for a dedicated platform: Attribuly Pricing.
You’ve got this—electronics buyers reward clarity, compatibility reassurance, and post‑purchase support. Your email program can provide all three while reliably showing its impact on revenue.